For Part one, Click here.
Hey, sorry it's been awhile since I continued this tutorial.
The painting part can be easy if you're going the color page route, or it can be challenging if you pick the custom image route, but I will give you some tips. So again, I recommend going with what you're most comfortable with.
With either method, you need the items listed in Part One.
In addition, you'll want to place a piece of white paper beneath your square on the clipboard to absorb the paint that bleeds through.
 |
| This is what the paper looks like after the paint bleeds through, so you see why this is important. |
You will also want a piece of scratch paper to check your colors and make sure the paint is flowing. This also serves to check your colors and to clean your white after it's been in contact with other colors.
Color Page Method:
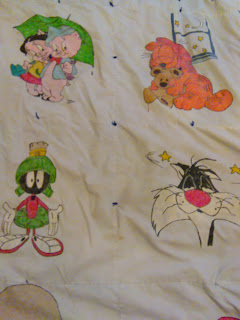
As outlined in part one, you can take a page from a coloring book and transfer it onto the square with carbon paper.
Once you've done that, use your fabric paints, (Tri-Chem and/or Aunt Martha's) and simply color them in like any page on a coloring book.
Be sure to hold paint tube vertically, and don't squeeze too hard.
Here are some my aunt and cousin did:
Custom Image Method:
Be certain to transfer every visible shape and change in color of the image. This can take forever, but it makes the process so much easier.
Once the image is transferred, you utilize the same principle as the color page method. It's just a more complex color page.
Order of painting:
To avoid smearing paint all over your hand and across the square, work left to right and top to bottom.
Blending:
You will have more difficulty in getting the correct color sometimes. For example, in my People Under The Stairs Square, the smokey-cloud thingies in the background were this odd blackish purple color. I was able to duplicate it by layering.
This is an example of when blending the paints is a good idea.
Also, blending is great with faces.
However, sometimes you DON'T want them to blend, like when you're doing white lettering on a dark background or any sort of eye detail. In that case, you need to wait for your square to dry. It takes a full 24 hours, but you can probably get away with 8.
Dimension:
Things like wood and hair require use of progressively lighter and darker shades of the same color.
Patience:
Some squares are just a pain because they are so detailed and they take forever.
Courage:
The majority of the reason that this square took so long was because I kept chickening out and procrastinating on working on it. When I buckled down, it wasn't really that hard.
I've never really taught painting before, so if you have any questions, please ask and I'll do my best.
Next post will be on the actual sewing, which will start in a few weeks. This will be my first time, so it's going to be scary!


Oh... you've got this. On the plus side, it's pretty much straight lines. Go slow. Don't try to go to fast. You've got it.
ReplyDeleteThat's the thing! From my foray into pillowcases, I SO don't have straight lines down yet! LOL!
Delete